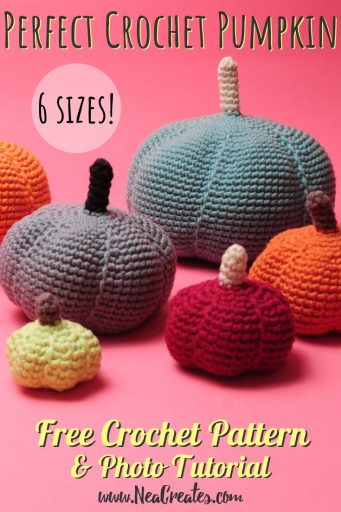
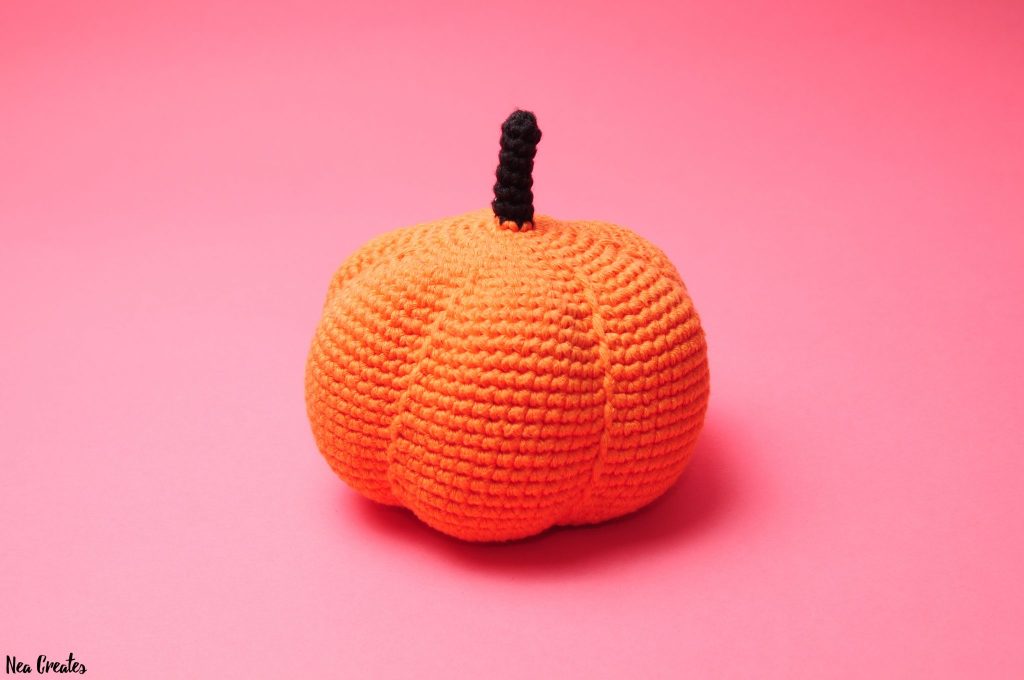
Perfect Crochet Pumpkin: Free Amigurumi Pattern
October 1st, 2019 | Leave a comment | by Nea
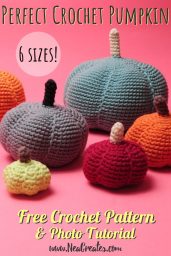
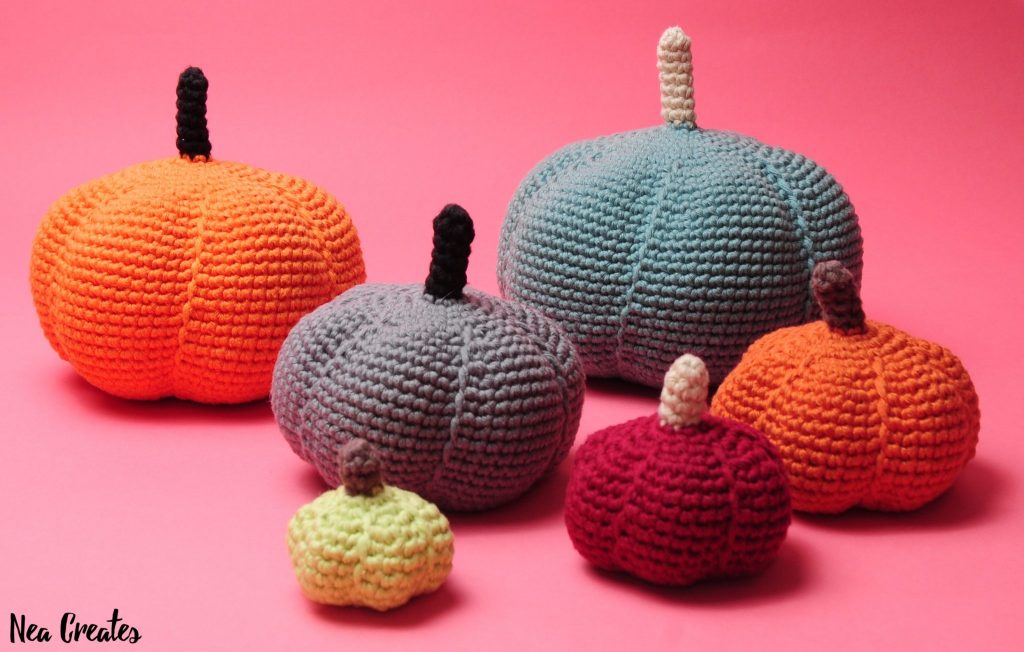
I finally finished the pattern for the pumpkins I crocheted last year, enjoy!
About the pattern
You can buy a bundle of two beautifully formatted PDF versions of this pattern on Etsy. One version uses color, while the other is made in black and white to be more printer friendly.
Add this pattern to your Ravelry queue on the Perfect Crochet Pumpkin Ravelry page.
Disclaimer: This pattern is an original pattern by Nea Creates, it may not be redistributed in any way, shape or form. If you want to share the pattern you may link to the pattern post, you may not repost the pattern on your site. Items completed from this pattern may be sold, provided that you give Nea Creates credit for the pattern and provide a link to the pattern post or the Nea Creates home page.
Size: 2XL: 13×14.5, XL: 11.5×13, L: 9×10.5, M: 7.5×9.5, S: 6.5×7, XS: 5×4.5 (HxWxDcm).
Difficulty: Easy/Intermediate
Notes: This pattern is written in English, US crochet terminology and SI units are used throughout. I use a smaller hook size than the yarn calls for to get tighter stitches. The pumpkin is crocheted in one piece in continuous rounds. All measurements are approximate & will vary with your yarn & tension.
Materials & Tools
- – Yarn calling for 4.5mm hook in 2 colors, e.g. Adlibris Cotton 8/9 / Adlibris Cotton Aran
- – 2XL: Primary 75g/113m Secondary 3g/5m
- – XL: Primary 56g/84m Secondary 3g/5m
- – L: Primary 40g/60m Secondary 2g/3m
- – M: Primary 27g/41m Secondary 2g/3m
- – S: Primary 15g/23m Secondary 1g/2m
- – XS: Primary 6g/9m Secondary 1g/2m
- – 3.5mm crochet hook
- – Stuffing
- – Stitch markers
- – Scissors
- – Yarn needle
- – 2 safety eyes (optional)
Abbreviations & Stitches used
- R# – Row/round number #
- P# – Picture number #
- N – Note/instruction
- T – Tip
- yo – Yarn over
- pt – Pull through
- st(s) – Stitch(es)
- mr – Magic ring/circle/loop
- ss – Slip stitch
- sc(s) – Single crochet(s)
- inc – Increase: 2 scs in same st
- idec – Invisible sc decrease (normal decrease works too)
- ccsc – Color change sc: insert hook in next st, yo, pt, yo in new color & pt both loops on hook
- dss – Deep ss: ss in next ss 1 row below, skip ss behind (normal ss works too)
- flo – Front loops only
The Pattern – Perfect Crochet Pumpkin
General instructions
N The pumpkin is crocheted from top to bottom starting in secondary & ending in primary color.
T It’s easy to miss the st after a ss/dss, count sts between ss/dss to prevent this.
2X Large
R1 6 sc in a mr (6)
R2-8 6 sc (6)
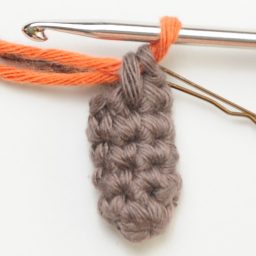
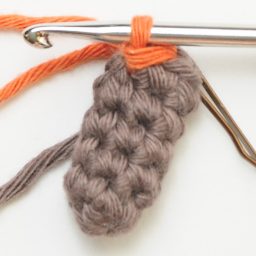
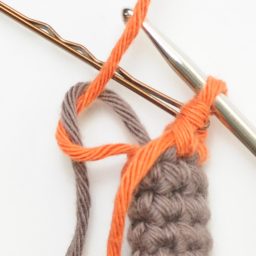
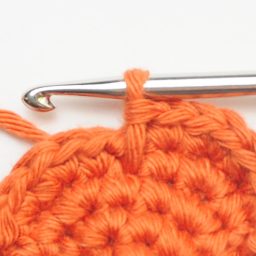
R9 ccsc (to primary) P1, ss P2, 4 sc (6)
N Cut secondary color yarn & carefully knot it with primary color yarn tail P3.
R10 6 inc (12)
R11 [inc, sc]×6 (18)
R12 [sc, inc, sc]×6 (24)
R13 [inc, 3 sc]×6 (30)
R14 [2 sc, inc, 2 sc]×6 (36)
R15 [inc, 5 sc]×6 (42)
R16 [ss, sc, inc, 2 sc, inc, sc]×6 (54)
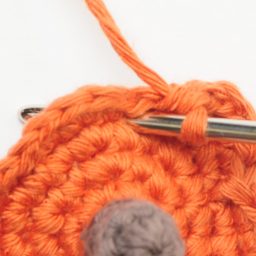
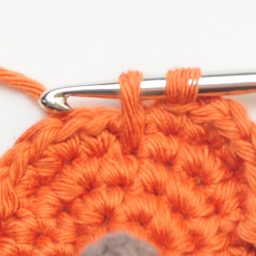
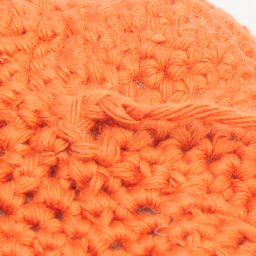
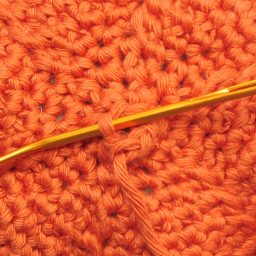
R17 [dss P4-6, 8 sc]×6 (54)
R18 [ss, sc, inc, 4 sc, inc, sc]×6 (66)
R19 [dss, 10 sc]×6 (66)
R20 [ss, sc, inc, 6 sc, inc, sc]×6 (78)
R21 [dss, 12 sc]×6 (78)
R22 [ss, sc, inc, 8 sc, inc, sc]×6 (90)
R23-38 [dss/ss, 10 sc]×6 (90)
R39 [dss, sc, idec, 8 sc, idec, sc]×6 (78)
R40 [ss, 12 sc]×6 (78)
R41 [dss, sc, idec, 6 sc, idec, sc]×6 (66)
R42 [ss, 10 sc]×6 (66)
R43 [dss, sc, idec, 4 sc, idec, sc]×6 (54)
R44 [ss, 8 sc]×6 (54)
R45 [dss, sc, idec, 2 sc, idec, sc]×6 (42)
N Add safety eyes (optional).
N Stuff & shape continuously from here.
R46 [idec, 5 sc]×6 (36)
R47 [2 sc, idec, 2 sc]×6 (30)
R48 [idec, 3 sc]×6 (24)
R49 [sc, idec, sc]×6 (18)
R50 [idec, sc]×6 (12)
R51 6 idec (6)
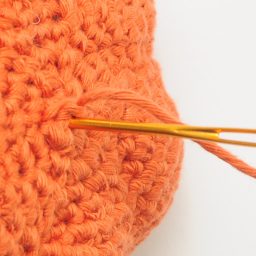
N Make sure pumpkin is stuffed & shaped to your liking. Ss in next st. Leaving a yarn tail for closing, cut yarn & pull out of last st. Weave yarn tail around flo of remaining sts (6), pull to close, then bury it inside the pumpkin P7-9.
X Large
R1 6 sc in a mr (6)
R2-7 6 sc (6)
R8 ccsc (to primary) P1, ss P2, 4 sc (6)
N Cut secondary color yarn & carefully knot it with primary color yarn tail P3.
R9 6 inc (12)
R10 [inc, sc]×6 (18)
R11 [sc, inc, sc]×6 (24)
R12 [inc, 3 sc]×6 (30)
R13 [2 sc, inc, 2 sc]×6 (36)
R14 [ss, 2 sc, inc, 2 sc]×6 (42)
R15 [dss P4-6, sc, inc, 2 sc, inc, sc]×6 (54)
R16 [ss, 8 sc]×6 (54)
R17 [dss, sc, inc, 4 sc, inc, sc]×6 (66)
R18 [ss, 10 sc]×6 (66)
R19 [dss, sc, inc, 6 sc, inc, sc]×6 (78)
R20-33 [ss/dss, 10 sc]×6 (78)
R34 [ss, sc, idec, 6 sc, idec, sc]×6 (66)
R35 [dss, 10 sc]×6 (66)
R36 [ss, sc, idec, 4 sc, idec, sc]×6 (54)
R37 [dss, 8 sc]×6 (54)
R38 [ss, sc, idec, 2 sc, idec, sc]×6 (42)
R39 [dss, 2 sc, idec, 2 sc]×6 (36)
N Add safety eyes (optional).
N Stuff & shape continuously from here.
R40 [2 sc, idec, 2 sc]×6 (30)
R41 [idec, 3 sc]×6 (24)
R42 [sc, idec, sc]×6 (18)
R43 [idec, sc]×6 (12)
R44 6 idec (6)
N Make sure pumpkin is stuffed & shaped to your liking. Ss in next st. Leaving a yarn tail for closing, cut yarn & pull out of last st. Weave yarn tail around flo of remaining sts (6), pull to close, then bury it inside the pumpkin P7-9.
Large
R1 6 sc in a mr (6)
R2-6 6 sc (6)
R7 ccsc (to primary) P1, ss P2, 4 sc (6)
N Cut secondary color yarn & carefully knot it with primary color yarn tail P3.
R8 6 inc (12)
R9 [inc, sc]×6 (18)
R10 [sc, inc, sc]×6 (24)
R11 [inc, 3 sc]×6 (30)
R12 [ss, sc, 2 inc, sc]×6 (42)
R13 [dss P4-6, 6 sc]×6 (42)
R14 [ss, sc, inc, 2 sc, inc, sc]×6 (54)
R15 [dss, 8 sc]×6 (54)
R16 [ss, sc, inc, 4 sc, inc, sc]×6 (66)
R17-28 [dss/ss, 10 sc]×6 (66)
R29 [dss, sc, idec, 4 sc, idec, sc]×6 (54)
R30 [ss, 8 sc]×6 (54)
R31 [dss, sc, idec, 2 sc, idec, sc]×6 (42)
R32 [ss, 6 sc]×6 (42)
R33 [dss, sc, 2 idec, sc]×6 (30)
N Add safety eyes (optional).
N Stuff & shape continuously from here.
R34 [idec, 3 sc]×6 (24)
R35 [sc, idec, sc]×6 (18)
R36 [idec, sc]×6 (12)
R37 6 idec (6)
N Make sure pumpkin is stuffed & shaped to your liking. Ss in next st. Leaving a yarn tail for closing, cut yarn & pull out of last st. Weave yarn tail around flo of remaining sts (6), pull to close, then bury it inside the pumpkin P7-9.
Medium
R1 6 sc in a mr (6)
R2-5 6 sc (6)
R6 ccsc (to primary) P1, ss P2, 4 sc (6)
N Cut secondary color yarn & carefully knot it with primary color yarn tail P3.
R7 6 inc (12)
R8 [inc, sc]×6 (18)
R9 [sc, inc, sc]×6 (24)
R10 [ss, sc, inc, sc]×6 (30)
R11 [dss P4-6, sc, 2 inc, sc]×6 (42)
R12 [ss, 6 sc]×6 (42)
R13 [dss, sc, inc, 2 sc, inc, sc]×6 (54)
R14-23 [ss/dss, 8 sc]×6 (54)
R24 [ss, sc, idec, 2 sc, idec, sc]×6 (42)
R25 [dss, 6 sc]×6 (42)
R26 [ss, sc, 2 idec, sc]×6 (30)
R27 [dss, sc, idec, sc]×6 (24)
N Add safety eyes (optional).
N Stuff & shape continuously from here.
R28 [sc, idec, sc]×6 (18)
R29 [idec, sc]×6 (12)
R30 6 idec (6)
N Make sure pumpkin is stuffed & shaped to your liking. Ss in next st. Leaving a yarn tail for closing, cut yarn & pull out of last st. Weave yarn tail around flo of remaining sts (6), pull to close, then bury it inside the pumpkin P7-9.
Small
R1 6 sc in a mr (6)
R2-4 6 sc (6)
R5 ccsc (to primary) P1, ss P2, 4 sc (6)
N Cut secondary color yarn & carefully knot it with primary color yarn tail P3.
R6 6 inc (12)
R7 [inc, sc]×6 (18)
R8 [ss, 2 inc]×6 (30)
R9 [dss P4-6, 4 sc]×6 (30)
R10 [ss, sc, 2 inc, sc]×6 (42)
R11-18 [dss/ss, 6 sc]×6 (42)
R19 [dss, sc, 2 idec, sc]×6 (30)
R20 [ss, 4 sc]×6 (30)
R21 [dss, 2 idec]×6 (18)
N Add safety eyes (optional).
N Stuff & shape continuously from here.
R22 [idec, sc]×6 (12)
R23 6 idec (6)
N Make sure pumpkin is stuffed & shaped to your liking. Ss in next st. Leaving a yarn tail for closing, cut yarn & pull out of last st. Weave yarn tail around flo of remaining sts (6), pull to close, then bury it inside the pumpkin P7-9.
X Small
R1 6 sc in a mr (6)
R2-3 6 sc (6)
R4 ccsc (to primary) P1, ss P2, 4 sc (6)
N Cut secondary color yarn & carefully knot it with primary color yarn tail P3.
R5 6 inc (12)
R6 [ss, inc]×6 (18)
R7 [dss P4-6, 2 inc]×6 (30)
R8-13 [ss/dss, 4 sc]×6 (30)
R14 [ss, 2 idec]×6 (18)
R15 [dss, idec]×6 (12)
N Add safety eyes (optional).
N Stuff & shape.
R16 6 idec (6)
N Make sure pumpkin is stuffed & shaped to your liking. Ss in next st. Leaving a yarn tail for closing, cut yarn & pull out of last st. Weave yarn tail around flo of remaining sts (6), pull to close, then bury it inside the pumpkin P7-9.
All done!
If you made your own Perfect Crochet Pumpkin, please share it with me on social media! @NeaCreates