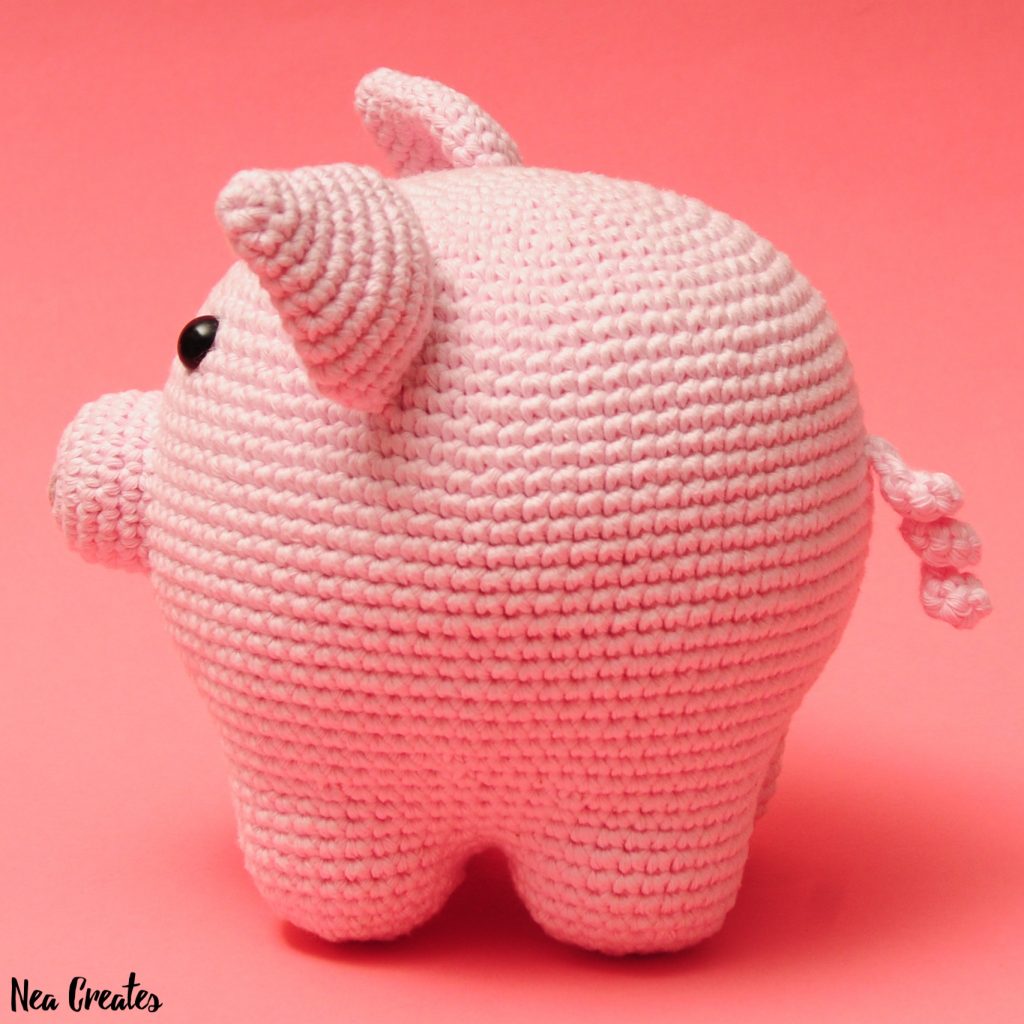
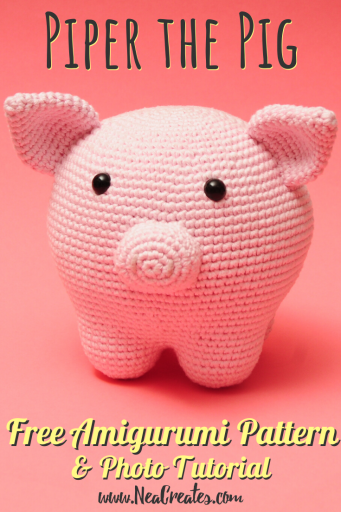
Piper the Pig: Free Amigurumi Pattern
March 8th, 2020 | 8 Comments | by Nea


About the pattern
You can buy a bundle of two beautifully formatted PDF versions of this pattern on Etsy. One version uses color, while the other is made in black and white to be more printer friendly.
Add this pattern to your Ravelry queue on the Piper the Pig Ravelry page.
Disclaimer: This pattern is an original pattern by Nea Creates, it may not be redistributed in any way, shape or form. If you want to share the pattern you may link to the pattern post, you may not repost the pattern on your site. Items completed from this pattern may be sold, provided that you give Nea Creates credit for the pattern and provide a link to the pattern post or the Nea Creates home page.
Size: 15.5cm tall & 17.5cm wide with ears, 14.5cm tall & wide without ears.
Difficulty: Experienced
Notes: This pattern is written in English, US crochet terminology and SI units are used throughout. I use a smaller hook size than the yarn calls for to get tighter stitches. Piper is crocheted top down in continuous rounds. All measurements are approximate & will vary with your yarn & tension.
Materials & Tools
- – Yarn calling for 4.5mm hook in 2 colors, e.g. Adlibris Cotton 8/9 / Adlibris Cotton Aran
- – Pig color: 110g/165m
- – Snout accent color: <1g/2m
- – A 3.5mm crochet hook
- – Stuffing
- – Stitch markers
- – Scissors
- – Yarn needle
- – A pair of 12mm safety eyes
Abbreviations & Stitches used
- R# – Row/round number #
- P# – Picture number #
- N – Note/instruction
- T – Tip
- yo – Yarn over
- pt – Pull through
- st(s) – Stitch(es)
- ch(s) – Chain(s)
- lp(s) – Loop(s)
- sk # – Skip # sts
- mr – Magic ring/circle/loop
- ss – Slip stitch
- sc(s) – Single crochet(s)
- inc – Increase, 2 scs in same st
- dec – Decrease, sc 2 sts together
- idec – Invisible sc decrease (normal decrease works too)
- flo – Front loops only
- blo – Back loops only
- A – Pig color
- B – Snout accent color
The Pattern – Piper the Pig
Ears (2)
R1 6 sc in a mr (6)
R2 [sc, inc, sc]×2 (8)
R3 [inc, 3 sc]×2 (10)
R4 [2 sc, inc, 2 sc]×2 (12)
R5 [inc, 3 sc]×3 (15)
R6 [2 sc, inc, 2 sc]×3 (18)
R7 [inc, 5 sc]×3 (21)
R8 [3 sc, inc, 3 sc]×3 (24)
R9 [inc, 7 sc]×3 (27)
R10 27 sc (27)
R11 [idec, 7 sc]×3 (24)
R12 [sc, idec, sc]×6 (18)
N Ss in next st. Leaving a long yarn tail, cut yarn, yo & pt lp on hook completely, pull to create a knot.
Snout
R1 6 sc in a mr (6)
R2 6 inc (12)
R3 [sc, 4 inc, sc]×2 (20)
R4 [4 sc, 2 inc, 4 sc]×2 (24)
R5-7 24 sc (24)
N Ss in next st. Leaving a long yarn tail, cut yarn, yo & pt lp on hook completely, pull to create a knot.
N Using B yarn, embroider 2 lines on snout.
Tail
R1 ch 13, sk 1 ch, 12 inc (24)
N Leaving a long yarn tail, cut yarn, yo & pt lp on hook completely, pull to create a knot.
Body
R1 6 sc in a mr (6)
R2 6 inc (12)
R3 [inc, sc]×6 (18)
R4 [sc, inc, sc]×6 (24)
R5 [inc, 3 sc]×6 (30)
R6 [2 sc, inc, 2 sc]×6 (36)
R7 [inc, 5 sc]×6 (42)
R8 [3 sc, inc, 3 sc]×6 (48)
R9 [inc, 7 sc]×6 (54)
R10 [4 sc, inc, 4 sc]×6 (60)
R11 [inc, 9 sc]×6 (66)
R12 [5 sc, inc, 5 sc]×6 (72)
R13 [inc, 17]×4 (76)
R14 [9 sc, inc, 9 sc]×4 (80)
R15 [inc, 39 sc]×2 (82)
R16 [20 sc, inc, 20 sc]×2 (84)
R17 [inc, 41 sc]×2 (86)
R18 [21 sc, inc, 21 sc]×2 (88)
R19-30 88 sc (88)
R31 [idec, 42 sc]×2 (86)
R32 [21 sc, idec. 20 sc]×2 (84)
R33 [idec, 19 sc]×4 (80)
R34 [4 sc, idec, 4 sc]×8 (72)
R35-36 72 sc (72)
R37 [inc, sc, inc, 15 sc]×4 (80)
R38 [sc, inc, sc, inc, 16 sc]×4 (88)
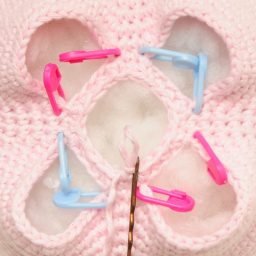
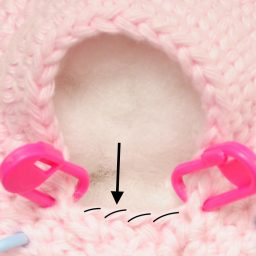
R39 [2 sc, inc & mark second sc, sc, inc & mark first sc, 17 sc]×4 P1-2 (96)
R39.5 to move end of row, 3 sc, remove marker from next st, sc & mark new st, sc, end of row should now be between 2 markers P3 (96)

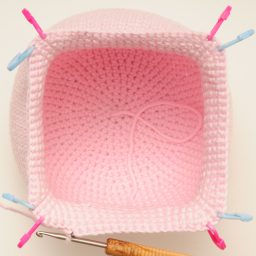

N Make sure st count is correct & markers are evenly spaced with 1 & 21 sts between. Stuff & shape continuously from here.
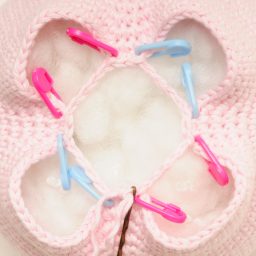
R40 without moving markers, [ss, ch 4, sk 21, ss, sc]×4 P4 (28)
N Insert eyes between R15 & R16 with 12 sts between symmetrically above a pair of leg openings. P5
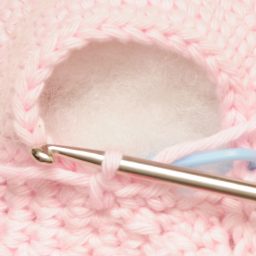
R41 working in blo of chs & in both lps of all other sts from R40, [dec, 2 sc, dec, sc]×4 P6-7 (20)


R42 [2 idec, sc]×4 (12)
R43 6 idec (6)
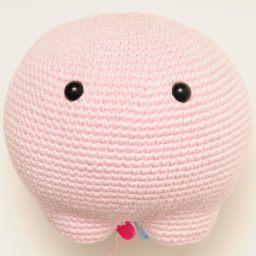
N Make sure body is stuffed & shaped to your liking as it is harder to stuff & shape from the legs. Ss in next st. Leaving a yarn tail for closing, cut yarn & pull out of last st. Weave yarn tail around flo of remaining sts (6), pull to close, then bury it inside the body. P8-9
Legs (4)
T Crochet the legs in anti-clockwise order.
R1 put a slipknot on the hook & sc in middle left ch P10, sc in next ch, sc in marked sc from R39/39.5 & remove marker P11, 21 sc, sc in marked sc from R39/39.5 & remove marker, sc in each of remaining 2 chs (27)

R2 [3 sc, idec, 4 sc]×3 (24)
R3 [sc, idec, sc]×6 (18)
N If on last leg, make sure body is stuffed & shaped to your liking before continuing.
N Stuff & shape continuously from here.
R4 [idec, sc]×6 (12)
R5 6 idec (6)
N Make sure leg is stuffed & shaped to your liking. Ss in next st. Leaving a yarn tail for closing, cut yarn & pull out of last st. Weave yarn tail around flo of remaining sts (6), pull to close, then bury it inside the leg.
Assembly
N Stuff & sew snout onto face, sew ears onto head, sew tail onto back of body. P13-14


All done!
If you made your own Piper the Pig, please share it with me on social media! @NeaCreates


Nice. It was kinda hard to do, since I was using a 3mm hook with 8 ply yarn, but it’s cute. 🙂
That does sound like a challenge. 😉 Thank you! 😊
needing help in this row of pattern pls
R39.5 to move end of row, 3 sc, remove marker from next st, sc & mark new st, sc, end of row should now be between 2 markers P3 (96)
Hi! Sorry for the super duper late reply, what part of the row is confusing you? The point of R39.5 is to move where you end/start the remaining rows, you can see this by comparing the positions of my bobby pin marker and crochet hook in P2 and P3.
I made this and it looks just like your photos!!! Amazing pattern, I’m super happy with the piggy! You should totally do a YouTube video on making this!!
That’s awesome! Thank you so much! ❤️🙏 Hopefully I will have time to get into making videos sometime in the future, it would be a lot of fun I think.😊
I am having a hard time with that row of pattern as well. I understand it is to move the end/ start of the row but it says (96) stitches. What part of the pattern are we to repeat? Thank you
The stitch count should be 96 after R39. So since R39.5 only moves the end/start of each row/round we will still have 96 stitches after R39.5 as well.